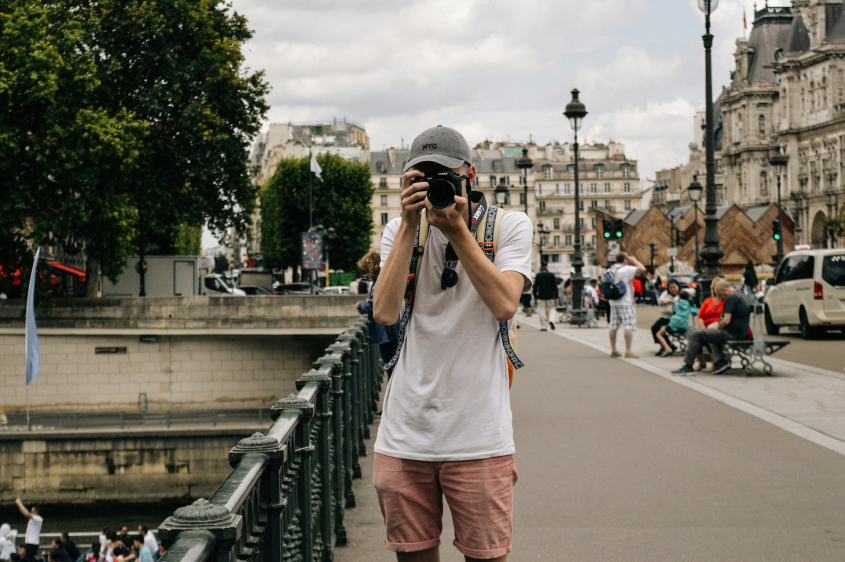
Travel photography has the incredible power to capture and immortalize the beauty of your adventures. Whether you’re exploring vibrant cities, breathtaking landscapes, or immersing yourself in new cultures, photography allows you to freeze those unforgettable moments in time. In this section, we will explore the power of travel photography and the essential gear you’ll need to get started.
Travel Photography: Capturing Unforgettable Moments
The Power of Travel Photography
Travel photography goes beyond simply taking pictures. It allows you to tell a story, evoke emotions, and share your experiences with others. Each photograph has the ability to transport viewers to a different time and place, creating a connection and inspiring a sense of wanderlust.
By capturing the essence of a destination, travel photography enables you to preserve precious memories and share them with friends, family, and even the wider online community. It serves as a visual diary of your adventures, reminding you of the incredible moments you’ve experienced and inspiring others to embark on their own journeys.
Essential Gear for Travel Photography
To embark on your travel photography journey, it’s important to have the right gear that suits your needs and preferences. While the specific equipment may vary depending on your style and destination, here are some essential items to consider:
| Gear | Description |
|---|---|
| Camera | Choose a camera that suits your skill level and budget. Options range from compact point-and-shoot cameras to advanced DSLRs or mirrorless cameras. |
| Lenses | Invest in a versatile lens, such as a wide-angle lens for capturing landscapes and a zoom lens for versatile framing options. |
| Tripod | A sturdy tripod is essential for capturing sharp images, especially in low light conditions or when using longer exposures. |
| Memory Cards | Ensure you have ample storage space by carrying multiple memory cards. Consider their capacity and speed for efficient shooting. |
| Batteries | Always carry extra batteries to keep your camera powered throughout your adventures. |
| Camera Bag | Invest in a durable and comfortable camera bag to protect your gear and keep it organized while on the move. |
| Lens Cleaning Kit | Keep your lenses free from dust, smudges, and fingerprints with a lens cleaning kit. |
| Remote Shutter Release | A remote shutter release allows you to take photos without touching the camera, reducing the risk of camera shake. |
| Filters | Consider using filters such as polarizing filters to enhance colors, neutral density filters for long exposures, or graduated filters for balancing exposure. |
Having the right gear is essential, but remember that the best camera is the one you have with you. Don’t be discouraged if you don’t have the latest and most expensive equipment. Focus on developing your photography skills and making the most of what you have.
Now that you understand the power of travel photography and have an idea of the essential gear, it’s time to dive into the techniques and tips that will help you capture stunning images during your adventures. Stay tuned for our upcoming sections on mastering composition, lighting and exposure, creative techniques, connecting with locals, and editing and post-processing.
Mastering Composition
Composition plays a crucial role in travel photography, allowing you to capture stunning and visually appealing images. By employing various techniques, you can create photographs that truly stand out. In this section, we will explore three key composition techniques: the Rule of Thirds, Leading Lines, and Framing and Perspective.
Rule of Thirds
The Rule of Thirds is a fundamental principle in photography composition. It involves dividing the image into a grid of nine equal parts by drawing two horizontal and two vertical lines. The main subjects of your photo should ideally be placed along these lines or at the points where they intersect. This technique helps create a balanced and visually pleasing composition.
Placing your subject off-center, rather than in the center of the frame, adds interest and allows the viewer’s eye to move around the image. It enhances the overall composition and draws attention to the subject. When applying the Rule of Thirds, consider aligning the horizon with either the top or bottom horizontal line to create a sense of balance.
Leading Lines
Leading lines are powerful compositional tools that guide the viewer’s eye through the image. These lines can be found in various elements such as roads, fences, rivers, or architectural features. By positioning the lines in a way that leads towards your subject, you can create a dynamic and engaging composition.
Leading lines can add depth and dimension to your photographs. They create a sense of movement and draw the viewer’s attention towards the main subject. Experiment with different angles and perspectives to make the leading lines more prominent and effective in your composition.
Framing and Perspective
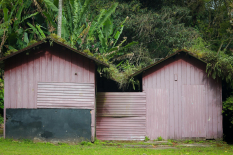
Framing and perspective are techniques that add depth and interest to your travel photographs. Framing refers to using elements within the scene, such as archways, windows, or tree branches, to frame your subject. This technique adds a sense of context and draws focus to the subject by creating a natural frame within the frame.
Perspective, on the other hand, involves experimenting with different angles and viewpoints. Instead of capturing the subject from eye-level, try shooting from a low angle or a higher vantage point to create unique perspectives. This can provide a fresh and captivating view of the subject and the surroundings.
Remember, composition is subjective, and experimenting with different techniques can help you develop your own style. By mastering the Rule of Thirds, utilizing leading lines, and exploring framing and perspective, you can elevate your travel photography and capture compelling images that tell a story.
Lighting and Exposure
Proper lighting and exposure are essential elements in travel photography. They can make the difference between a mediocre shot and a stunning image that captures the essence of your travel experience. In this section, we will explore three important aspects of lighting and exposure: the magic of the golden hour, balancing exposure, and utilizing natural light.
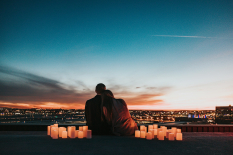
Golden Hour Magic
The golden hour, also known as the magic hour, refers to the period shortly after sunrise or before sunset when the sun is low in the sky. During this time, the light is soft, warm, and diffused, creating a beautiful golden glow. The golden hour provides a fantastic opportunity for capturing stunning landscapes, portraits, and architectural details.
To make the most of the golden hour, it’s important to plan your photo sessions accordingly. Check the local sunrise and sunset times and arrive at your desired location early to allow time for setup. Experiment with different angles and compositions to take advantage of the warm, flattering light. Keep in mind that the golden hour is relatively short, so be prepared to work quickly to capture the best shots.
Balancing Exposure
Balancing exposure is crucial in travel photography, especially when dealing with challenging lighting conditions. When shooting outdoors, you may encounter situations where the subject is either too bright or too dark in relation to the background. This can lead to overexposed or underexposed images.
To achieve a balanced exposure, consider using exposure compensation on your camera. This feature allows you to adjust the exposure settings to make the subject stand out without losing details in the highlights or shadows. Additionally, using the histogram function on your camera can help you analyze the distribution of light and ensure proper exposure.
Utilizing Natural Light
One of the advantages of travel photography is the opportunity to work with natural light. Natural light can create stunning effects, enhance colors, and add depth to your images. When shooting outdoors, take advantage of the available light sources, such as the sun, moon, or ambient light from street lamps or buildings.
To utilize natural light effectively, pay attention to the direction and quality of light. The direction of light can create interesting shadows and highlights, adding dimension to your photographs. The quality of light can vary depending on weather conditions and time of day. Soft, diffused light on cloudy days can be perfect for capturing portraits, while harsh sunlight can create dramatic landscapes.
Experiment with different angles and positions to find the best lighting for your subject. Consider using reflectors or diffusers to manipulate the light and achieve the desired effect. By understanding how to work with natural light, you can elevate your travel photography and capture images that truly showcase the beauty of your surroundings.
Proper lighting and exposure are fundamental to capturing compelling travel photos. The golden hour offers a magical lighting opportunity, balancing exposure ensures well-exposed images, and utilizing natural light adds depth and dimension to your compositions. With these techniques in mind, you’ll be well on your way to creating stunning travel photographs that tell captivating stories.
Creative Techniques
When it comes to travel photography, incorporating creative techniques can elevate your images and make them truly memorable. In this section, we will explore three game-changing techniques: long exposure for stunning landscapes, capturing motion with panning, and playing with depth of field.
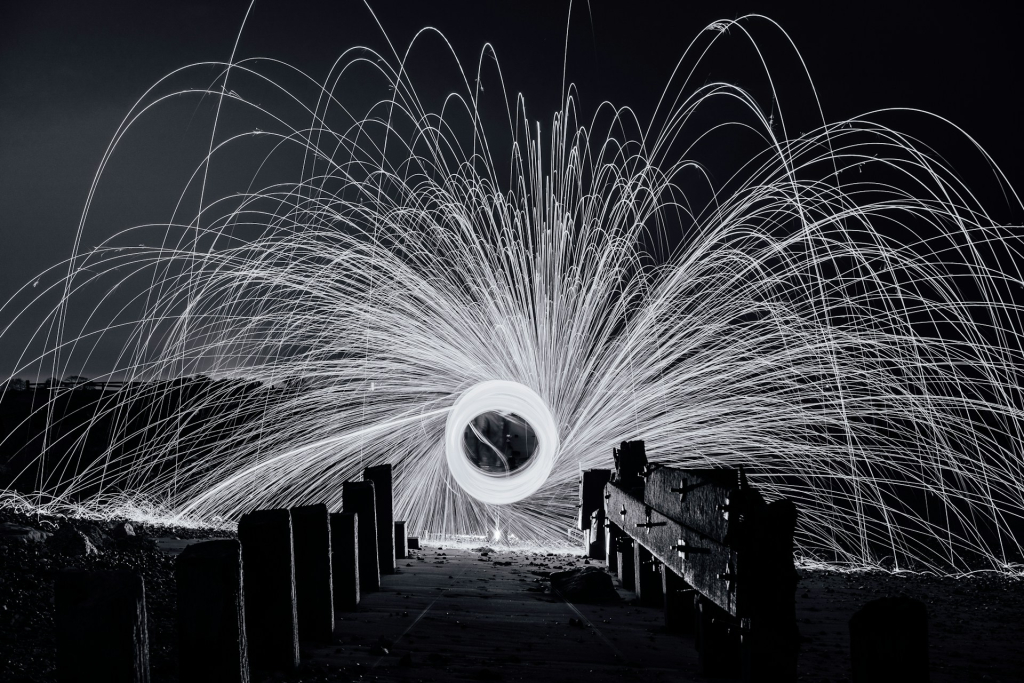
Long Exposure for Stunning Landscapes
Long exposure photography is a technique that involves using a longer shutter speed to capture movement over an extended period of time. This technique is particularly effective when photographing landscapes, as it can create stunning effects such as silky smooth waterfalls, streaking clouds, and ethereal night skies.
To achieve long exposure shots, you will need a sturdy tripod to keep your camera stable during the longer exposure. Set your camera to manual mode and choose a low ISO setting to minimize noise. Select a small aperture (higher f-number) to increase the depth of field and allow for a longer exposure time. Finally, use a neutral density (ND) filter to reduce the amount of light entering the lens, enabling longer exposures even in bright conditions.
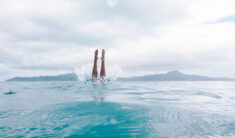
Capturing Motion with Panning
Panning is a technique used to capture a moving subject while creating a sense of motion in the image. It involves tracking the subject with your camera as it moves horizontally or vertically, resulting in a sharp subject against a blurred background. This technique is commonly used in sports photography, wildlife photography, and street photography to add a dynamic element to the image.
To achieve a successful panning shot, choose a relatively slow shutter speed that allows you to track the subject smoothly. Start by focusing on the subject and then follow its movement while pressing the shutter button. Maintain a steady motion and try to keep the subject in the same position in the frame throughout the exposure. Experiment with different shutter speeds and practice to get the desired effect.
Playing with Depth of Field
Controlling the depth of field in your photographs can greatly enhance the visual impact of your images. By selectively focusing on a specific subject while blurring the background or foreground, you can create a sense of depth and draw attention to the main subject.
To manipulate the depth of field, adjust the aperture settings on your camera. Use a wide aperture (small f-number) like f/2.8 or f/4 to achieve a shallow depth of field with a blurred background. This technique is ideal for portraits or to isolate a subject from a busy background. On the other hand, if you want to capture a landscape with a larger depth of field, choose a smaller aperture (larger f-number) like f/11 or f/16. This will ensure that both the foreground and background are in focus.
By experimenting with these creative techniques, you can add a unique and artistic touch to your travel photographs. Remember to practice and have fun while exploring the possibilities. For more travel tips and tricks, check out our article on travel tips and tricks. Happy shooting!
Connecting with the Locals
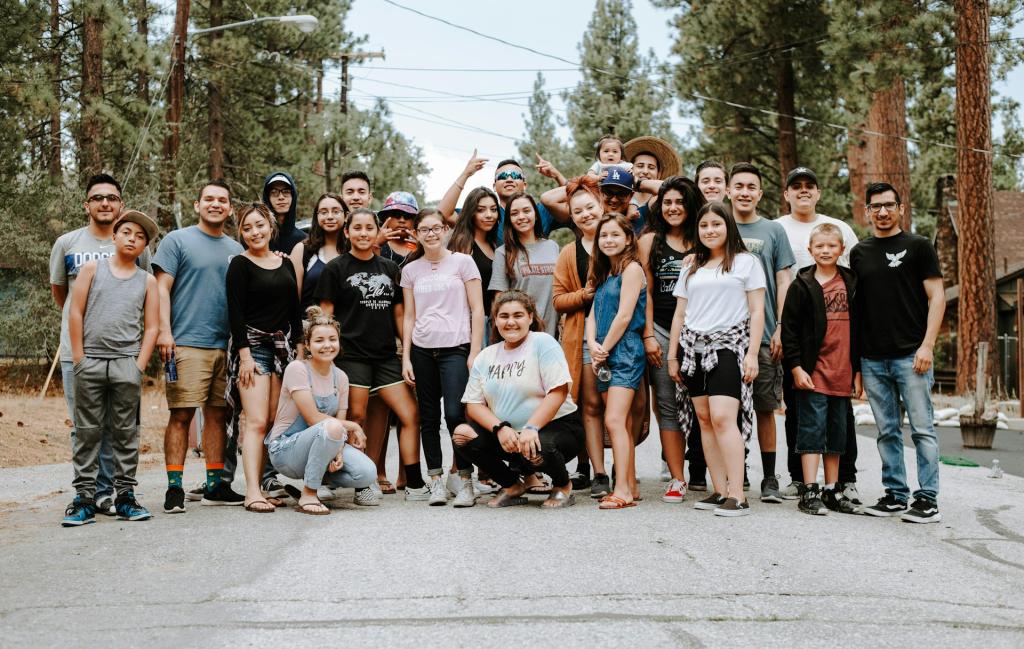
Travel photography is not just about capturing beautiful landscapes and iconic landmarks; it’s also about telling a story and capturing the essence of a place. One of the best ways to do this is by connecting with the locals. By building rapport, taking candid portraits, and documenting cultural experiences, you can add depth and authenticity to your travel photography.
Building Rapport
Building rapport with the locals is essential for capturing genuine moments and authentic interactions. Take the time to engage with the people you encounter during your travels. Smile, show respect, and be genuinely interested in their culture and way of life. By establishing a connection, you can create a comfortable environment that allows for more natural and candid photographs.
When approaching locals for photography, always ask for permission. Explain your intentions and show appreciation for their willingness to be a part of your photography. This not only helps to build trust but also ensures that you are respecting their privacy and cultural norms.
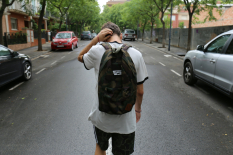
Candid Portraits
Candid portraits are a powerful way to capture the true spirit of a place and its people. Instead of staging posed shots, try to capture moments of spontaneity and emotion. Keep your camera ready and observe your surroundings for interesting interactions or expressions. These candid moments can often result in the most compelling and authentic photographs.
To capture candid portraits, opt for a longer lens that allows you to maintain some distance while still capturing intimate details. This will enable you to photograph people in their natural state without making them self-conscious or altering their behavior.
Documenting Cultural Experiences
Traveling provides numerous opportunities to immerse yourself in different cultures and experiences. Documenting these cultural experiences through your photography can help preserve traditions and share the richness of the places you visit.
Pay attention to the details that make a culture unique – traditional clothing, rituals, festivals, or daily routines. By capturing these elements, you can create a visual narrative that highlights the diversity and beauty of different cultures.
Remember to approach cultural experiences with sensitivity and respect. Be aware of any cultural practices or restrictions regarding photography and always seek permission when necessary.
By connecting with the locals, capturing candid portraits, and documenting cultural experiences, you can create a travel photography collection that goes beyond mere snapshots. Your photographs will tell stories, evoke emotions, and provide viewers with a deeper understanding of the places you’ve visited and the people you’ve encountered along the way.
Editing and Post-Processing
Once you’ve captured stunning travel photos, the editing and post-processing stage allows you to enhance and refine your images to make them truly stand out. Here are some essential techniques to take your travel photography to the next level.
Enhancing Colors and Contrast
One of the key aspects of editing travel photos is enhancing colors and contrast to make your images pop. Adjusting the saturation, vibrance, and clarity can bring out the vibrant colors present in your shots. However, it’s important to strike a balance and avoid over-saturating the image, which can result in an unnatural appearance.
To bring out the contrast and details in your photos, you can adjust the tone curve or use tools like shadows and highlights. This helps to create a more dynamic range and make your subjects stand out against the background.
Cropping and Straightening
Cropping and straightening your travel photos can significantly improve the composition and overall impact of your images. Cropping allows you to remove distractions, unnecessary elements, or empty spaces, focusing the viewer’s attention on the main subject. It can also help you achieve more balanced compositions or create a stronger sense of symmetry.
Straightening is particularly useful when your horizon or vertical lines appear skewed or tilted. Making adjustments to ensure that your lines are level can make a big difference in the overall aesthetics of your photo. Many photo editing software tools offer easy-to-use straightening features to help you align your images.
Read Also >>> pedrovazpaulo executive coaching
Preserving the Authenticity
While editing can enhance your travel photos, it’s important to preserve the authenticity and integrity of the captured moment. Avoid excessive manipulation that alters the reality of the scene or misrepresents the true experience. Strive for a natural and realistic look that reflects the atmosphere and emotions of the moment you captured.
Resist the temptation to apply heavy filters or effects that may quickly become outdated. Instead, focus on subtle adjustments that enhance the strengths of your photo while still maintaining its authenticity and timelessness.
By utilizing these editing and post-processing techniques, you can elevate your travel photos and bring out their full potential. Remember, editing should be a tool to enhance and refine your images, not to completely transform them. Let your creativity shine while staying true to the essence of the moment you captured.