
When it comes to building a website on WordPress, there are countless plugins available that offer various functionalities and design options. However, relying too heavily on plugins can have its drawbacks. That’s where custom WordPress theme development comes into play. In this section, we will explore the benefits of creating custom WordPress themes and breaking free from the limitations of plugins.
Why Custom WordPress Themes?
Custom WordPress themes provide a tailored solution for your website. By developing a theme from scratch, you have complete control over the design, functionality, and performance of your website. Here are a few reasons why custom WordPress themes are worth considering:
- Unique Design: With a custom theme, you can create a visually stunning and unique website that perfectly aligns with your brand identity. You are not limited to pre-designed templates or generic layouts.
- Optimized Performance: Custom themes are built specifically for your website, allowing you to optimize performance by minimizing unnecessary code and assets. This can result in faster loading times and improved user experience.
- Flexibility and Scalability: Custom themes offer the flexibility to add or modify features as your website grows. You can easily incorporate new functionalities or make changes without relying on third-party plugins.
- SEO-Friendly: By developing a custom theme, you have the opportunity to implement SEO best practices from the ground up. This ensures that your website is optimized for search engines, improving your chances of ranking higher in search results.
Breaking Free from Plugins
While plugins can be useful for adding specific functionalities, relying on too many plugins can negatively impact your website’s performance and security. Some common issues associated with excessive plugin usage include:
- Plugin Conflicts: Plugins developed by different authors may not always work well together, leading to conflicts that affect the functionality of your website.
- Security Vulnerabilities: Using too many plugins increases the potential attack surface for hackers. Outdated or poorly coded plugins can introduce security vulnerabilities to your website.
- Performance Overhead: Each plugin you add to your website comes with its own set of scripts and stylesheets, which can slow down your website’s loading speed.
By opting for custom WordPress theme development, you can reduce reliance on plugins and have more control over your website’s performance, security, and functionality. Custom themes allow you to build a streamlined and efficient website that meets your specific needs.
Getting Started with Custom Theme Development
When it comes to creating custom WordPress themes, getting started on the right foot is essential. In this section, we will look at two important steps you need to take before diving into custom theme development: setting up a local development environment and understanding the WordPress template hierarchy.
Setting Up a Local Development Environment
To develop a custom WordPress theme, it’s recommended to set up a local development environment on your computer. This allows you to work on your theme without affecting your live website. Here’s a step-by-step guide to setting up a local development environment:
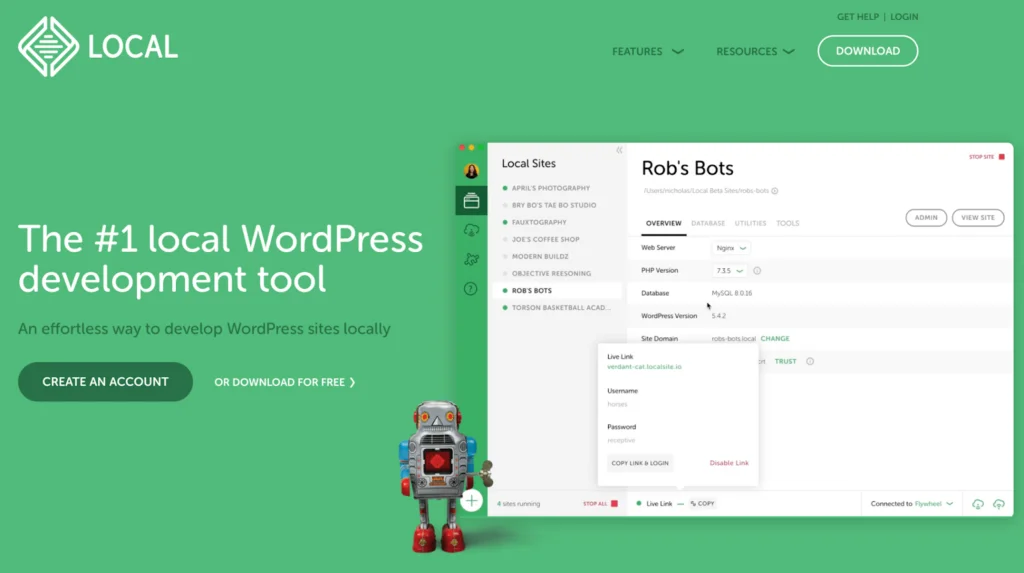
- Choose a local development tool: There are several tools available to create a local development environment, such as XAMPP, WampServer, or Local by Flywheel. Select the tool that best fits your needs and install it on your computer.
- Install WordPress: Once your local development tool is set up, you can install the WordPress software. Most local development tools provide an easy way to install WordPress with a few clicks. Follow the instructions provided by your chosen tool to complete the installation.
- Create a new WordPress installation: After installing WordPress, create a new WordPress installation in your local development environment. This will serve as the sandbox where you can build and test your custom theme.
With your local development environment ready, you can now start exploring the WordPress template hierarchy.
Understanding the WordPress Template Hierarchy
The WordPress template hierarchy is a system that determines how WordPress displays different types of content. It helps in organizing and rendering the appropriate template files based on the content being displayed. Understanding the template hierarchy is crucial for custom theme development. Here’s a simplified overview of the WordPress template hierarchy:
index.php: The index.php file is the most basic template file in WordPress. It is used to display the main blog page and acts as a fallback template when more specific templates are not available.single.php: The single.php template is used to display a single blog post or a custom post type. It is the default template used when displaying individual posts.page.php: The page.php template is used to display individual pages. It is the default template used when displaying static pages.archive.php: The archive.php template is used to display archive pages, such as category, tag, author, or date archives. It provides a way to display a list of posts based on specific criteria.header.phpandfooter.php: The header.php and footer.php files contain the header and footer sections of your theme. These files are typically included in other template files using theget_header()andget_footer()functions.
Understanding the template hierarchy helps you create the necessary template files for different types of content in your custom theme. By leveraging this hierarchy, you can ensure that your theme is structured and organized properly.
Building the Theme Structure
In order to embark on custom WordPress theme development, it’s important to establish a solid foundation by creating the theme folder and necessary files. This section will guide you through the process of building the theme structure step by step.
Creating the Theme Folder and Files
To begin, navigate to the wp-content/themes/ directory in your WordPress installation. Here, you will create a new folder with a descriptive name for your custom theme. This folder will serve as the container for all the theme files.
Once you’ve created the theme folder, there are a few essential files that you need to include:
- style.css: This file is responsible for defining the styles of your theme. It contains the necessary metadata and acts as the main stylesheet for your theme.
- index.php: The index.php file serves as the default template for displaying your website’s content. It is the backbone of your theme and should never be omitted.
- functions.php: The functions.php file is where you can add custom PHP functions and modify various aspects of your theme. It plays a crucial role in extending the functionality of your theme.
- header.php: The header.php file contains the code for the header section of your website. This includes the site title, navigation menu, and other elements that appear at the top of each page.
- footer.php: The footer.php file contains the code that appears at the bottom of each page, such as copyright information, additional navigation, or any other content you want to include.
By including these core files, you establish the basic structure of your custom WordPress theme. This structure provides the necessary framework for further customization and development.
Setting Up the Stylesheet and Functions File
The style.css file is a critical component of your theme as it defines the visual appearance of your website. Within this file, you will specify the theme name, author, version, and other relevant details. Additionally, you can include custom CSS rules to style your website according to your design preferences.
The functions.php file, on the other hand, allows you to extend the functionality of your theme. You can add custom PHP functions, enqueue stylesheets and scripts, register custom navigation menus, and much more. This file acts as a powerhouse for implementing additional features and customizations.
To ensure proper stylesheet and functions file setup, follow the example below:
/*
Theme Name: My Custom Theme
Theme URI: [Link to your theme's page]
Author: Your Name
Author URI: [Link to your website or profile]
Description: A custom WordPress theme created for [describe your theme's purpose]
Version: 1.0
License: GNU General Public License v2 or later
License URI: [Link to the license if applicable]
Text Domain: my-custom-theme
*/
<?php
// Enqueue the main stylesheet
function my_custom_theme_enqueue_styles() {
    wp_enqueue_style( 'my-custom-theme-style', get_stylesheet_uri() );
}
add_action( 'wp_enqueue_scripts', 'my_custom_theme_enqueue_styles' );
?>
By following these steps, you lay the groundwork for your custom WordPress theme. With the theme folder and essential files in place, you’re ready to move on to the next stages of customizing and adding functionality to your theme.
Customizing the Theme
Once you have set up the basic structure of your custom WordPress theme, it’s time to dive into customizing its appearance and functionality. In this section, we will explore two important aspects of theme customization: designing the header and footer, and creating custom page templates.
The header and footer are critical elements of any WordPress theme as they provide consistency and navigation throughout the website. Customizing these sections allows you to create a unique and cohesive design that aligns with your brand or website goals.
To design the header, you can start by modifying the header.php file in your theme. This file contains the HTML markup and PHP code responsible for rendering the header section. By editing this file, you can add your logo, navigation menus, search bar, or any other elements you desire. Remember to use proper HTML and CSS techniques to ensure a responsive and accessible design.
Similarly, to customize the footer, you can edit the footer.php file. This file controls the content displayed at the bottom of each page. You can add copyright information, social media icons, additional navigation, or any other relevant content. Just like with the header, make sure to create a design that complements the overall look and feel of your website.
Creating Custom Page Templates
In addition to the default page template provided by WordPress, you have the option to create custom page templates that cater to specific needs or layouts. These templates enable you to have different designs for various pages on your website.
To create a custom page template, start by duplicating the page.php file in your theme folder. Rename the duplicated file with a descriptive name, such as “template-contact.php” for a contact page template. Within this new file, you can modify the HTML and PHP code to create the desired layout and functionality for that specific page.
Once you have created the custom page template, you can assign it to individual pages within the WordPress admin dashboard. When editing a page, you’ll find a “Page Attributes” section where you can select the desired template from a dropdown menu.
By utilizing custom page templates, you can have full control over the design and structure of different pages within your WordPress theme. This flexibility allows you to create unique layouts for landing pages, blog archives, portfolio pages, and more.
Customizing the header and footer, as well as creating custom page templates, are essential steps in the custom WordPress theme development process. These customizations contribute to the overall user experience and visual appeal of your website. Remember to test your theme thoroughly and ensure that it remains responsive and functional across various devices and browsers.
Adding Functionality to the Theme
Once you have created the basic structure of your custom WordPress theme, it’s time to enhance its functionality. This section will focus on two key aspects: customizing the WordPress loop and incorporating custom post types and taxonomies.
Customizing the WordPress Loop
The WordPress loop is a fundamental component that retrieves and displays posts from the database. By customizing the loop, you can control how posts are displayed on different pages of your theme. This allows you to tailor the appearance and layout of your content.
To customize the WordPress loop, you will need to modify the index.php file or create custom template files for specific pages. By using WordPress template tags and functions, you can retrieve and display specific post types, categories, or tags. This gives you the flexibility to create unique designs for different sections of your website.
Here is an example of how you can customize the loop to display only posts from a specific category:
<?php
    // Custom query to retrieve posts from a specific category
    $args = array(
        'category_name' => 'your-category-slug',
    );

    $custom_query = new WP_Query( $args );

    // The Loop
    if ( $custom_query->have_posts() ) {
        while ( $custom_query->have_posts() ) {
            $custom_query->the_post();
            // Display your post content here
        }
    } else {
        // Display a message if no posts are found
        echo 'No posts found.';
    }

    // Restore original post data
    wp_reset_postdata();
?>
By customizing the WordPress loop, you have the power to create unique layouts and display content in a way that aligns with your design vision.
Incorporating Custom Post Types and Taxonomies
In addition to customizing the loop, you can expand the functionality of your custom theme by incorporating custom post types and taxonomies. Custom post types allow you to create different types of content beyond the standard posts and pages. This can include portfolios, testimonials, products, or any other content that suits your website’s purpose.
To create a custom post type, you can utilize the register_post_type() function in your theme’s functions.php file. This function allows you to define the labels, settings, and capabilities for your custom post type. You can also specify whether the post type should support features like comments, revisions, or custom fields.
Similarly, custom taxonomies provide a way to organize and categorize your custom post types. You can create taxonomies like tags or categories specific to your custom content. This helps in organizing and filtering your content based on different criteria.
To incorporate custom post types and taxonomies, you can use the register_taxonomy() function. This function allows you to define the labels, settings, and hierarchical structure (if applicable) for your custom taxonomies.
By incorporating custom post types and taxonomies, you can better organize and manage your content, providing a more tailored experience for your users.
With these additions to your custom WordPress theme, you can truly unleash its potential and create a unique website that meets your specific needs. The ability to customize the WordPress loop and incorporate custom post types and taxonomies opens up a world of possibilities for your theme’s functionality and design. Stay tuned for the next section, where we will explore advanced techniques in custom theme development.
Advanced Techniques in Custom Theme Development
As we delve deeper into custom WordPress theme development, there are advanced techniques that can take your theme to the next level. In this section, we will explore two of these techniques: adding custom widgets and implementing theme options.
Adding Custom Widgets
Widgets are a powerful way to add dynamic functionality to your WordPress theme. By creating custom widgets, you can provide users with additional features and content areas that can be easily managed through the WordPress admin panel. Custom widgets allow users to personalize their websites without the need for external plugins.
To add custom widgets to your theme, you’ll need to follow a few steps:
- Register the widget: Register the widget using the
register_widget()function in your theme’sfunctions.phpfile. This function allows you to define the widget’s name, description, and callback function. - Create the widget class: Create a new class that extends the
WP_Widgetclass. This class will contain the widget’s functionality, including the output for the frontend and the form for the widget settings in the backend. - Implement the widget methods: Within the widget class, you’ll need to implement specific methods such as
__construct(),widget(),form(), andupdate(). These methods handle the widget’s initialization, frontend output, backend form display, and saving of widget settings, respectively.
By following these steps, you can create custom widgets tailored to your theme’s specific needs. These widgets can enhance the user experience and provide additional functionality without relying on external plugins.
Implementing Theme Options
Theme options allow users to customize the appearance and behavior of your WordPress theme. By implementing theme options, you provide users with a user-friendly interface to make changes to their website without touching the code.
To implement theme options, you can follow these general steps:
- Create a theme options page: Create a separate admin page specifically for managing theme options. This page will serve as the interface for users to make changes to their website.
- Define and save options: Within the theme options page, define the various options you want to offer users. These options can include settings for colors, typography, layout, and more. Save these options using the WordPress Options API.
- Retrieve and apply options: In your theme files, retrieve the saved options using the appropriate functions provided by the Options API. Apply these options to the relevant areas of your theme to reflect the user’s choices.
Implementing theme options allows users to customize your theme to their liking, resulting in a more personalized website experience. It gives users the flexibility to make changes without the need for coding skills or external plugins.
By incorporating custom widgets and theme options into your custom WordPress theme, you can provide users with a powerful and flexible platform to create and manage their websites. These advanced techniques elevate your theme development process, allowing you to offer tailored solutions without relying on third-party plugins.
Best Practices and Tips for Custom Theme Development
When it comes to custom WordPress theme development, following best practices and employing efficient coding techniques is essential. This ensures that your theme is well-structured, performs optimally, and is easy to maintain. Here are two key areas to focus on: writing clean and efficient code, and thoroughly testing and debugging the theme.
Writing Clean and Efficient Code
Writing clean and efficient code is crucial for the long-term success of your custom WordPress theme. By adhering to coding best practices, you can enhance the readability, maintainability, and performance of your codebase. Here are some tips to keep in mind:
- Consistent Indentation: Maintain a consistent and logical indentation style throughout your code. This improves readability and makes it easier for others to understand and contribute to your theme.
- Modular Approach: Break your code into smaller, reusable modules and functions. This promotes code reusability, reduces redundancy, and makes it easier to maintain and update your theme in the future.
- Comments and Documentation: Include clear and concise comments in your code to explain complex logic, functions, or sections. Additionally, consider creating thorough documentation that outlines the structure, functionality, and usage of your custom theme.
- Proper Naming Conventions: Use meaningful and descriptive names for variables, functions, and classes. This helps in understanding the purpose and functionality of different elements of your theme.
- Minimize External Requests: Minimize the number of external requests, such as unnecessary JavaScript or CSS files. This reduces the load time of your theme and improves overall performance.
- Optimize Images: Compress and optimize images used in your theme to reduce their file size without compromising on quality. This improves page load times and enhances the user experience.
Testing and Debugging the Theme
Thoroughly testing and debugging your custom WordPress theme ensures its stability, compatibility, and functionality. Here are some best practices to follow:
- Cross-Browser Compatibility: Test your theme on different browsers (e.g., Chrome, Firefox, Safari, and Edge) to ensure consistent rendering and functionality across various platforms.
- Responsive Design: Ensure that your custom theme is responsive and displays correctly on different devices and screen sizes. This provides a positive user experience for visitors accessing your website from various devices.
- Plugin Compatibility: Test your theme with popular WordPress plugins to ensure compatibility and smooth integration. This helps prevent conflicts and ensures that your theme works seamlessly with commonly used plugins.
- Error Handling: Implement proper error handling and logging mechanisms to catch and handle any errors or exceptions that may occur during the execution of your theme.
- Performance Optimization: Optimize the performance of your theme by analyzing its loading speed, optimizing database queries, and employing caching techniques.
- Security Considerations: Regularly update your theme to address any security vulnerabilities. Additionally, sanitize and validate all user input to prevent common security issues like cross-site scripting (XSS) attacks.
By following these best practices and thoroughly testing your custom WordPress theme, you can create a high-quality, reliable, and performant theme that meets the specific requirements of your website. For more WordPress theme development tutorials and resources, check out our WordPress theme development tutorials page.