Cricut machines have become a staple in the world of DIY and crafting. They allow users to cut various materials such as paper, vinyl, fabric, and more with great precision. At the center of these precise cuts is the Cricut mat—a sticky surface that holds materials firmly in place during cutting. However, with frequent use, this mat gradually loses its stickiness. It starts collecting lint, dust, fibers, and even oil from your hands, making it less effective.
This can cause problems like materials slipping out of place or cuts becoming inaccurate. Instead of immediately replacing your mat, it’s possible to restore it and extend its life. In this guide, we’ll explain different types of Cricut mats, multiple cleaning methods, adhesive reapplication steps, and tips for maintaining your mat’s effectiveness for as long as possible.
Understanding Cricut Mat Types
Before attempting to clean or restore your Cricut mat, it is essential to identify which type you have. Cricut offers several mat types, each tailored for specific materials and purposes. Each mat type has a different level of adhesive strength and requires different care techniques.
LightGrip Mat (Blue)
The LightGrip mat is designed for lightweight materials such as standard printer paper, vellum, thin cardstock, and adhesive vinyl. Since it is the least sticky among all the mat types, it is more prone to collecting dust and paper fibers. This mat should be cleaned gently, avoiding any harsh scrubbing or strong chemicals that might strip away the light adhesive.
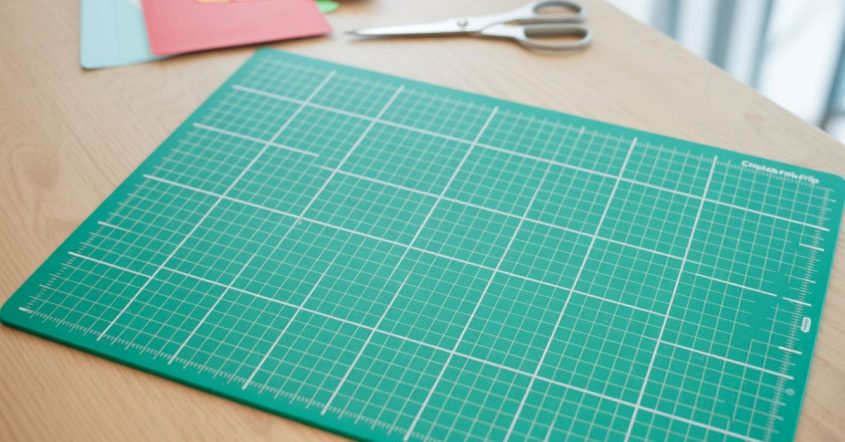
StandardGrip Mat (Green)
This is the most commonly used mat and is designed for medium-weight materials such as heavy cardstock, iron-on, vinyl, and patterned paper. It has a moderate adhesive level and can handle more aggressive cleaning techniques. It’s often the mat that requires regular maintenance since it’s used in a variety of projects.
StrongGrip Mat (Purple)
The StrongGrip mat is built for heavy-duty materials like thick cardstock, chipboard, poster board, and leather. It has a high adhesive strength, making it quite tacky to the touch. Because of its strong grip, this mat can trap fibers and debris more easily. It requires a firmer cleaning approach, but one must still be cautious not to overdo it.
FabricGrip Mat (Pink)
This mat is intended for use with fabric and the rotary blade. Its adhesive is specially formulated to secure fabric without damaging it. Due to its sensitive adhesive, cleaning must be done very gently. This mat is not as easily restorable once it loses stickiness, and it may need replacement sooner than others.
Knowing your mat type helps you choose the right cleaning and restoration methods, preventing damage and extending its usability.
Cleaning Methods to Restore Stickiness
If your Cricut mat has lost its stickiness, the first step should always be cleaning. Over time, dirt, fibers, and residue from materials can build up, creating a barrier between the adhesive and your project material. Proper cleaning can often restore your mat’s grip without the need for adhesive sprays or glue.
Using Baby Wipes
Alcohol-free baby wipes are one of the simplest and most effective tools for cleaning lightly used Cricut mats. They are gentle and don’t contain chemicals that can degrade the adhesive layer.
Instructions:
- Lay your Cricut mat on a flat, clean surface.
- Use an alcohol-free, unscented baby wipe and gently rub it in small circular motions across the surface.
- Focus more on areas with visible lint or stuck debris.
- Avoid excessive pressure that might wear down the adhesive.
- Allow the mat to dry completely before using it again. This may take 30 to 60 minutes.
This method is especially good for quick cleanups after a few projects and works best on LightGrip and StandardGrip mats.
Dish Soap and Warm Water
For mats that are heavily used or visibly dirty, a more thorough cleaning method using dish soap and warm water is recommended. This process helps remove residue from vinyl, paper fibers, and body oils.
Instructions:
- Fill a sink or shallow tub with warm water. Avoid hot water, as it can damage the mat.
- Add a few drops of mild, grease-cutting dish soap.
- Submerge your Cricut mat in the soapy water for a few minutes.
- Use a soft-bristle brush or non-abrasive sponge to gently scrub the surface.
- Rinse the mat thoroughly with clean water.
- Pat the mat dry with a lint-free towel.
- Let it air dry completely on a flat surface. Drying can take a few hours depending on humidity.
This method is highly effective in removing oils and dirt. It works well on StandardGrip and StrongGrip mats but should be avoided or done very gently on FabricGrip mats.
Windex or Ammonia-Free Glass Cleaner
Windex or a similar ammonia-free glass cleaner can be used to remove grime and sticky residue that may be hard to eliminate with soap and water.
Instructions:
- Place your mat on a flat surface.
- Spray a light mist of ammonia-free glass cleaner across the mat’s surface.
- Let it sit for about 5 minutes to loosen any grime or debris.
- Use a soft cloth or sponge to gently scrub in a circular motion.
- Rinse with warm water and pat dry with a towel.
- Leave the mat to air dry for at least an hour before use.
This method should only be used when other methods don’t work and is best suited for StandardGrip and StrongGrip mats. Avoid it entirely for FabricGrip mats.
Simple Green Cleaner
Simple Green is an all-purpose, non-toxic cleaner that can safely clean your Cricut mat without breaking down its adhesive properties.
Instructions:
- Mix Simple Green with water in a 1:1 ratio in a spray bottle.
- Spray the diluted solution over your mat’s surface.
- Allow it to sit for about 2 to 3 minutes.
- Use a sponge or soft brush to scrub gently.
- Rinse thoroughly with warm water and pat dry.
- Let the mat air dry fully before using.
This cleaner is a great balance between effectiveness and gentleness, making it suitable for all mat types, including the more sensitive FabricGrip mat.
Reapplying Adhesive to the Mat
If your mat is clean but still not sticky, the next step is to restore its tackiness using an adhesive product. This process can bring new life to an old mat but should be done with care. Always use repositionable adhesives—never permanent glue.
Zig 2-Way Glue Pen
Zig 2-Way Glue Pens are widely recommended by Cricut users due to their precision and ease of control. The glue goes on blue and dries clear and tacky.
Instructions:
- Ensure your mat is clean and completely dry.
- Use masking tape or painter’s tape to protect the edges of the mat.
- Apply a thin, even layer of glue over the cutting area.
- Allow it to dry until the glue becomes tacky (about 10–15 minutes).
- Remove the tape and test the stickiness with a piece of scrap paper.
This method is especially useful for those who want more control over how much adhesive is reapplied. It’s ideal for all Cricut mats except for the FabricGrip, which is best replaced when worn out.
Repositionable Spray Adhesives
Spray adhesives, such as Krylon Easy-Tack or Elmer’s Repositionable Spray, provide a fast and uniform adhesive layer. They are available at most craft stores and online.
Instructions:
- Clean your mat and allow it to dry completely.
- Use painter’s tape to mask off the border to avoid spraying areas that will run through the machine’s rollers.
- Lay down newspapers or cardboard to protect your work surface.
- Shake the spray can well and apply a light coat from about 10–12 inches away.
- Let it sit for 10–15 minutes to become tacky.
- Remove the tape and test the mat.
Spray adhesives are suitable for large areas and multiple mats, though care must be taken to avoid overspray and chemical fumes.
Maintenance Tips to Prolong Mat Life
To keep your Cricut mat working longer and reduce the need for frequent restoration, follow these simple maintenance tips:
- Replace the protective plastic cover after every use. This prevents dust and debris from sticking to the mat surface.
- Store mats flat. Avoid rolling or bending your mats, as this can cause warping.
- Avoid touching the adhesive area. Natural oils from your skin can reduce stickiness quickly.
- Use a scraper tool to remove leftover material after each project.
- Use a lint roller after working with materials like felt or fabric to clean small debris.
- Rotate your mats. Using more than one mat distributes wear evenly and extends the lifespan of each one.
By incorporating these habits into your crafting routine, you can avoid having to clean or restore your mat too frequently.
When to Replace a Cricut Mat
Despite your best efforts, some mats simply wear out over time and need to be replaced. Here are signs that indicate it’s time to get a new one:
- The mat is no longer sticky, even after cleaning and reapplying adhesive.
- The surface has deep grooves or cuts from the blade.
- The mat is warped or uneven, which can affect cutting accuracy.
- Adhesive or material residue won’t come off even after multiple cleaning attempts.
- The mat has become unsafe for the machine, with curled edges or loose layers.
Replacing a mat at the right time protects your materials, improves project outcomes, and prevents damage to your Cricut machine.
Conclusion
A clean, sticky Cricut mat is essential for accurate, smooth crafting results. Over time, all mats lose their stickiness due to regular use, but that doesn’t mean they need to be thrown away immediately. You can often restore the grip effectively with proper cleaning techniques—like using baby wipes, soapy water, or safe cleaners. When cleaning is not enough, applying a light layer of repositionable adhesive can bring it back to life. Taking care of your mat by storing it properly, using protective covers, and handling it carefully will help extend its lifespan. And when the mat is no longer functional despite your efforts, replacing it is the best option. These tips not only save you money but also help you get the best performance from your Cricut projects every time.